Why, do you ask, did I decide to put the frames up now then?? Well. At the time I had assumed I would just fill them with photos we already had. Also, this wall was SO blank and empty, I really just wanted to put something up there. Plus, I figured hanging it BEFORE we painted might be a good idea. In case I needed to make a bunch of extra holes or something (which I didn't).
Let's take a peek at how the wall evolved, shall we?
First off. I went to Michaels and browsed around for all white frames. I lucked out in that they had JUST (as in, that week), come out with a new line of white gallery frames on the cheap. They were significantly less expensive than the frames I had found at Target and Ikea. Well, assuming I could use a coupon, that is. Actually, even without a coupon they are a great price.
Here is the photo I snapped on my phone of the display:
As a frame of reference (ha), the largest frame on the bottom is $19.99 regular price, and the smallest one is $5.99. Very reasonable. Of course, I used a 25% off your entire purchase coupon. It ended up costing me just about $100 for all of them.
While I was there, I really had no idea what frames I needed. What else was I supposed to do to figure it out? So I started just laying them all out on the floor. I knew I wanted it to be a certain width (just about 10 inches wider in total than our sofa), I also knew I wanted them to be in one large frame. For all the frames to combine to form one large rectangle. So I just fiddled with them all until I was happy with the result.
Then I snapped a pic to remind myself of how to set it up at home.
After a couple of weeks I decided to tackle the hanging. Steve was working on another project, and I wanted to see if I could do the entire thing by myself!
Step1) Lay wrapping paper out on the floor. I taped two pieces together to get the right height.
Step2) Start laying your frames onto the paper, copying the layout you previously decided on (ie me looking at the pic on my phone).
If you haven't already done your layout, cut your paper to the size you want the gallery wall to be. Then use that as the parameters for where to place your frames.
Step 3)Outline all the frames on the paper. I used a pencil to trace each frame. Then I cut the wrapping paper around the frames.
Step 4) Take all the frames off the paper and mark on the paper, with a writing utensil, where each frame needs to hang. I just turned each frame over, noticed where the hanging bracket was and marked it with a cross. So, I would see that it was 2 inches down from the edge in the middle, then mark that spot on the paper.
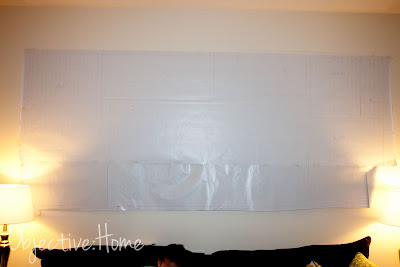
Step5) Hang the wrapping paper on the wall exactly where you want the mural to be. I used tape. This is the only spot I actually needed another set of hands. Steve held one side while I taped the other up.
Here is one with the flash so you can see a little bit better all the outlined frames. Sorry, you still can't really see them since I used a purple highlighter.
Step6) Pound a nail into each spot that you marked for hanging. Right through the paper.
You can see I also marked the size of each frame. Just in case I needed it.
Here is me, hard at work. (Not really, it took only about 30 seconds to do them all!)
Step7) After all the nails are in, carefully rip the paper off the wall.
YAY!! Nails are all in and I didn't have to make ANY extra holes!
Step8) Now, using the paper as your guide for placement, hang all the frames into their position.
Step9) Enjoy your DIY gallery wall!
Here it is in the sunlight.
Oh I would love to replace those lamps....
You would be surprised at how simple it really was! The work at home took 30 minutes max and I didn't have to fix any nail holes. I am definitely loving the look, so much better than the big empty space before.
Now I just have to book a session for some family photos to fill those babies up! I also can't wait to paint the room so that we can see how they look on the light gray walls.
This weekend hopefully we'll put a dent in a pretty big project we've begun- the shelving unit on the wall with the tv. YAY! I'll talk a bit about it as we go along. See you soon!


Did you ever post a finished picture? Looks great!!
ReplyDelete