Showing posts with label art. Show all posts

Wednesday, May 30, 2012

Think Outside The Box.


Today I thought I would do an intro piece for my post on wall hangings. Later I am going to delve into techniques and tricks for decorating your wall space. I'll go into more detail about how to get it right, and give you a handful of good hints for figuring it out in your home. But that's not for today.... 

When we moved into this house, I knew I was going to have get creative. Especially with the walls.

This house is almost twice the size of our last home, and there is about 100x more blank wall space. In our last home, being a 1900s antique house, almost every single wall had either a gorgeous leaded glass window, a doorway with extravagant wood molding, or a beautiful solid wood door. There was just about zero space or need for any wall art. I had a few spots to fill and that was about it.

Enter this house. Built in the last 20 years, with MUCH fewer windows, no fancy moldings or doors. That left a heck of a lot of wall space that cried out to be filled!

I knew I was going to have to get creative with my dollars and hands in order to fill the walls and add some personality into the very boring architecture. Seeing as I had just a small handful of pieces in my arsenal already. Most of which were mirrors (small spaces=lots of mirrors!).

I have already filled a good chunk of the walls, as you have seen in prior posts. Lots of painted canvas, printables, a gallery wall (which is still empty!), DIY sunbursts, and DIY chalkboards. Not to mention all the many mirrors (I am slightly obsessed with the amazing qualities of mirrors in a home). Besides all those things, here are two new ideas that I have recently used in our almost-finished family room.

I was trying to figure out how to fill the three narrow walls in the family room. We painted the room (well, 3 out of the 4 walls so far) a lovely gray and we have also finished the industrial wall unit. Between those two elements, there is a lot of texture and darker tones. With the walls, wood, & steel. So I knew I wanted to stick to white frames. I wanted all of the pieces on the wall to tie in together, and seeing as I did the gallery frames in white, and the chalkboard in white, it was a no-brainer.

But what to put in the frames....hmmm. I mulled it over a while and one day I just opened up Ebay on my computer and started looking around. Here is where I ended up.

Don't mind the huge white ottoman in the middle of the room there. We haven't gotten around to putting it in the basement yet.


And grrrrr, I see that the frames are slightly askew in this shot. BA! I hate that. I fixed it, but apparently AFTER I took the photo. Oh well.

Moving on! Let's start with this set of pieces here.


Oh I just love them. I knew I wanted something yellow to add a shot of color to the very neutral wall/shelving unit. After some browsing of different ideas I had rolling around in my head, I ended up searching "yellow nautical maps" on ebay and this is one of the sets that came up. I loved it right away because of a)how bright and graphic they are, and b)they are of Lake George NY! Moderately close to me, and a family vacation spot as well. I also loved how large they are. I am going to talk about scale tomorrow, but I wanted something substantial for this wall because of the large shelving unit right next to it, as well as the large window. I also knew I wasn't going to be putting any furniture in that space, so I wanted to make sure the wall pieces would suffice. Perfect, perfect, PERFECT. Know what's just as perfect??

That's right folks. I picked up all four maps (technically they are one long map), for a grand total of $17. SEVENTEEN!!! You saw how big they are right? How bright? How completely terrific?? Yup. I almost cried. What was just as good was that those lovely white frames were on a huge sale at Michaels and I paid under $10 a piece for them. So for all four framed maps, it was under $60. Something like $55. SCORE.

Look at the lovely detail. I really like how they are worn, a little riped and faded a bit too. Totally adds character and life to them. Plus they are just the most perfect shot of yellow for the space.

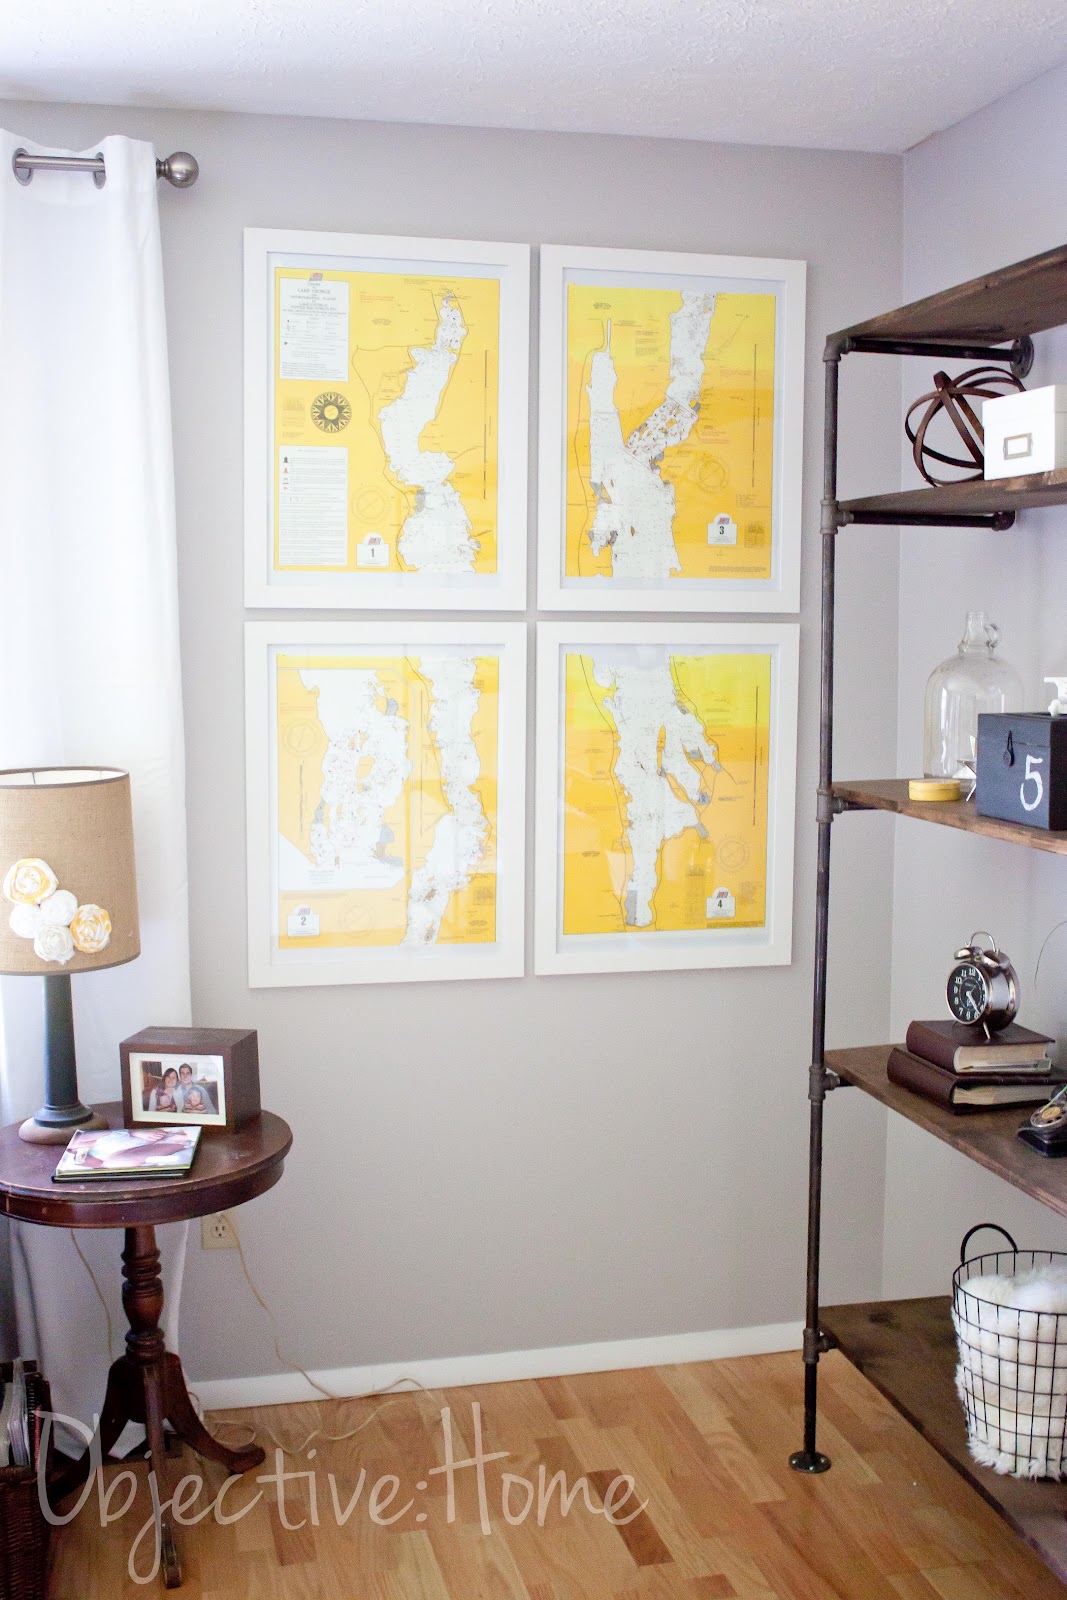
I made sure they were hung just high enough so that little children wouldn't knock into them accidentally. Yet they are still low enough to take care of needing any furniture on the wall. LOVE.

Here is an example of some of the ones you can find on Ebay on a daily basis. This one (there are lots like this) is a bit more subdued in color, but definitely gorgeous.

Up next is a set of four vintage National Geographic ads from the '50s that I stumbled upon. Again, I was on the lookout for a splash of yellow. I also wanted to add some black & white to help tie in the industrial/modern feel. The camera theme is running high in the room now, which I am totally digging. A couple '50s cameras on the shelving, and now four Kodak ads. There are two more, but they are for the unpainted wall, so you'll see those later. These are my favorite two though. GRRrrr with the slight crookedness!!

I love the vintage look, slightly yellowed and faded. I also think it's pretty neat that they all say Rochester, NY on the bottom (which you can't see here). Being that we are in Rochester and all, it is fun that they found their way back "home".


These were also a steal. I paid $2.99 each for them, and since they were from the same seller, I only paid the shipping for one. Woohoo! This is one of the other ones I picked up. I have no idea why it says sold for 5.99, since it was 2.99, but whatev. There is one more, another yellow one, that will hang with this one. The four frames were $5 a piece. So the total was $37 for all four framed pieces.

So. Point being. You can decorate your walls with unique, fun pieces for CHEAP! No one else has these exact sets and I love that. I love how unique the nautical maps are. I love that I didn't just pick them up at Target or wherever. They are one of a kind and completely cool. Take a look around Ebay, there are SO many great things that you can use to give your home personality. Vintage ads and maps ALLLLL over the place.

I'll be back soon with a whole bunch more advice on wall hangings, so watch out!

Thursday, April 26, 2012

Industrial Modern FUN

After a night full of working (mostly Steve) until 2am, we wrapped up the shelving unit! It looks 1000x better than I even imagined and I couldn't be any more thrilled with it. My incredible husband amazes me with his skills! He always works so hard to see my ideas and designs come to fruition. What a guy!

(Now, pardon the photos. I am a day or so away from being able to use my computer and Lightroom again, but for now I had to shoot in jpeg and do zero editing. So these are all straight out of the 'ol camera.)

Without further ado, here is our industrial/mid-century modern work of art. VOILA!

Don't mind the TV cords. Soon to be moved behind the TV.

Are you loving the gray wall as much as I am?? Again, we chose Sherwin Williams Grayish and it is perfect. Bright and light, with a touch of warmth, and it contrasts nicely with the white trim. It is a smidge off in color here, sorry, again, no editing. It is showing a bit greenish in the top two photos, but it is more warm and ZERO green in real life.

In terms of the styling, I am really enjoying how it is coming together. I am trying to blend loads of texture and keep everything earthy in color. Notice glass, metal, leather, lambskin, soft blankets, mirrors, paper, greenery, wicker, wire.

A bunch of the pieces I have found recently while antique shopping, some of them we've made or repurposed, and a couple of items we already had. I still have a fantastic Kodak camera from the '50s on the way from Ebay, as well as a really cool metal airplane. Other than that, this is it.

LOVE these '50s books I picked up last weekend for a buck or two a piece (Actually, the blue one is more recent, but looks super modern to me). Talk about great titles too!! "Fortune Is A Woman". Truer words were never spoken. ;) I painted that little wooden airplane that I snagged for $1.

Steve welded this nifty piece of artwork for me. Totally cool.

I am diggin' the mixture of soft/cushy with the wicker and metal and wood. Again, sticking with earth tones.
I picked up those wicker boxes at Michael's (last night actually) for 40% off plus 20% off with an entire purchase coupon. DEAL! They are perfect for holding all of our DVDs and our DVD player.

This awesome antique toy phone Steve and I discovered while on our day trip last month. The box is one I had that I painted with chalkboard paint.

These are all books I had. Camera for $5 last weekend. Spheres I made and featured HERE.

This cigar box I scored last weekend as well. Marked for $20 at the antique shop, I offered $10, she agreed. Woohoo! Perfect spot for the remotes and incredibly cool. 

All in all, a BIG success! It was surely a labor of love though. It took more time, more money, more stress, less sleep and a smidge of disagreeing (only natural right?) to get it done, but in the end, it is even better than I thought. 100% custom, totally unique, and crafted by hand by my amazing Stevie-Poo (sorry babe). 

Maybe I'll get more into the construction of it later (including more photos once we paint more than just that one wall), but for now, that's all folks! What's your favorite element/piece??

Oh, and a before and after, just for fun.

BEFORE

AFTER

Wednesday, April 25, 2012

Family Room Sneak Peek!

GAH!!! I'm so excited! Steve and I finally mustered up the energy to start back up on the family room shelving unit. We have been a smidge burned out lately and needed a minute to catch our breath. AHHHHH. So. Now that THAT is out of the way, onward!

Last night we set up the entire thing. Measured it, anchored it to the wall, put the unstained boards on it, hung the tv, and made sure we were happy. Ummmm. Happy? ECSTATIC! I didn't want to take it down!

Alas. We had to. Steve has to remove the two middle units in order to remove the boards to stain them. So it was just a sneak peek. But he managed to stain all the shelves last night and they are ready to go tonight. See? (iphone pics again, my computer is still on the fritz so I have no Lightroom)

Oh they look heavenly. Nice and dark cocoa-ish to pick up on the woodtones on the other side of the room in my desk and post office box. Coordinates so nicely with our coffee bean couches and contrasts perfectly with the white end tables and frames and the blue rug. I wanted them to look a bit distressed and aged, and Steve did such a great job. Love love love!

Here is what the piping looked like up, without the wood of course.

HUGE right??! I was surprised at how substantial they are! I mean, I knew it was going to be most of the wall, but it is hard to envision until you actually see them up. It is going to make SUCH a statement in the room and the entire first floor (this wall is visible throughout the floor). I don't even think you can tell that well from the photo, but they are lovely.

We are also planning on painting that wall tonight. Steve picked up the paint that I finally chose last night, and hopefully we'll whip that out this evening. We don't want to have to take the entire unit down again just to paint, so we'll do this one wall and then finish the rest soon.

Here is the color I picked.
Sherwin Williams Grayish. We color matched (like always) to Olympic Premium Latex paint since it is one of the only zero-voc paints with zero-voc colorant as well. Can't wait to see it up!! It is nice and light and bright and slightly warm to coordinate with all the warm brown tones we have in the room. Yet not beige-ish or too cool. I think it is going to be perfect with the industrial shelving. Hopefully tomorrow I can come back and show you! Maybe, maybe not. We'll see how much we get accomplished this evening.

Another really cool update for the room is in the artwork realm. I managed to snag four (fantastic!) nautical maps of Lake George NY on ebay this week. Graphic yellow. Gray. White. BIG. Annnnnnd $15 for all four. KILLER! I am going to frame them in the same frames that I used for the gallery wall and they will be grouped as a set on the wall where the old oak bookcase was. Here is a sneak peek.

PERFECT right??! I am in love. I had no idea they were going to be this lovely. What an absolute steal. Just when you think Ebay is lost and way overpriced. Wait until you see how incredible they are going to look all together.

I also have been wrangling some funky objects for the shelving lately. Today I painted a box I have been saving, with chalkboard paint. CB2 inspired! You'll see that soon. Lots going on here, and soon I'll have some more reveal photos to share. It is just so fun to see things coming together!

Friday, March 16, 2012

GPS Coordinate Welcome Printable

Up today is a quick how-to on making your own GPS coordinate welcome sign for your humble abode. I'm sure you've seen them all over Pinterest, but it only takes a few minutes if you have a Photoshop program of some type. If you don't, you could feel free to email me (via the CONTACT tab) your coords and I could whip you up one real quick & email it back to you. I'm feeling generous today, what can I say.

Here is the one I made for our entry way:

I changed the numbers up a bit, seeing as I didn't think it was a super wise idea to put our exact location on the internets. But you get the idea.

Want to make one? Well then, let's get crackin!

Step 1) Determine your GPS coordinates. I used THIS website. All you do is put your address in at the top and then it spits out your coords at the bottom of the page.

Here is where you put your address (in the slot marked address, go figure!):

Here is where it comes out (the 6 slots on the bottom):

Step 2) Find a background. To get the chevron pattern, I googled "free chevron background", then clicked on IMAGES. You can get the same one HERE.

Step 3) In Photoshop, use the background you just found, and then add a text box for your coordinates. I also lowered the opacity of the background and the text so it wasn't as dark/bright.

VOILA! Here is an example of another one I made.

I printed it out 8x10 then stuck it in a matted frame. Art for under $10. Right up my alley!
Pin It

Wednesday, March 14, 2012

Master Bedroom Wall Happenings (Free Printables!)

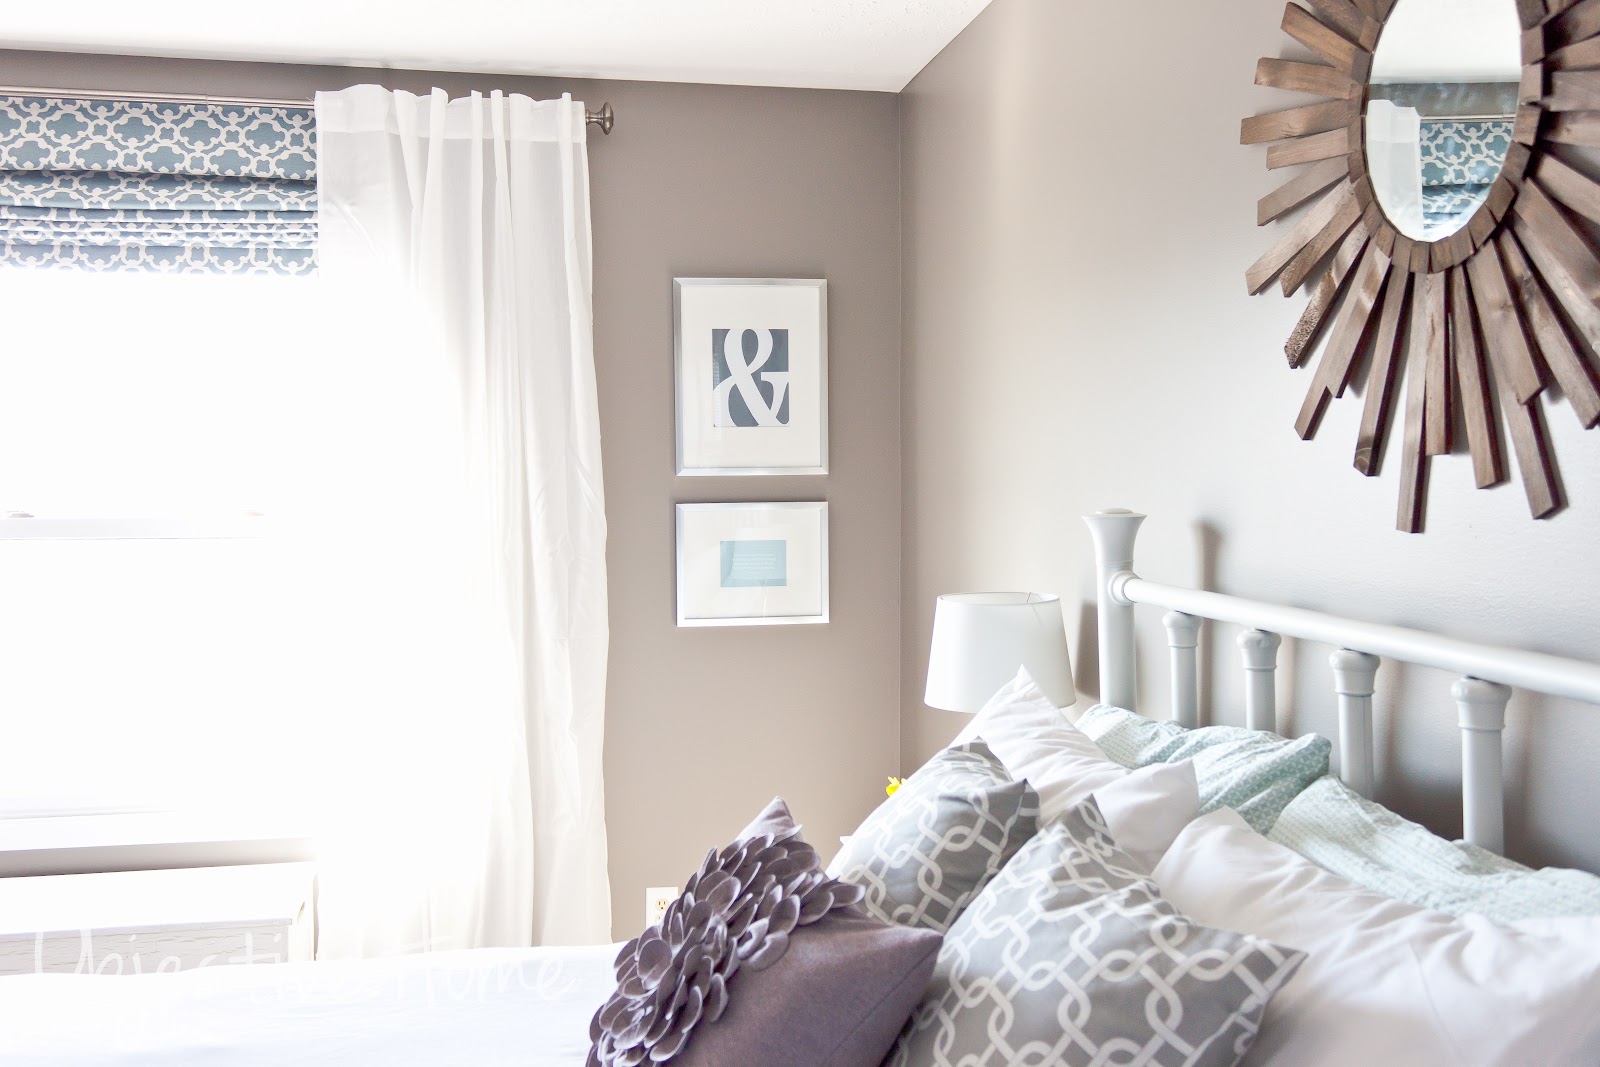
I took advantage of the nice weather yesterday and finally stained the sunburst mirror for our bedroom (tutorial HERE). I was SO nervous as I was staining it because holy smokes, it was dark. It stinks to spend so much time on something and then ruin it with the finishing. I just kept going and hoped it would be ok. I let it dry overnight and this morning it looked PERFECT! I think the dark stain is exactly what I was envisioning for the space. I wanted something dark to contrast all the white, and I think it will tie in with the dark brown leather chair (that I have yet to buy) in the corner and the leather ottoman under the smaller window. Adds a bit more masculinity to the room, which is nice. I want the space to look luxurious and relaxing, and give a nod to the man who also inhabits the space. Nothing TOO girly froo-froo.

I think I might need to move it a tad lower, now that I see the photos. I have a thing about wall decor hung too high on a wall. From what I've noticed, people tend to hang things much too high on their walls. It should be eye level in the center. Obviously, this piece is different, and it was super tricky getting it hung by myself.
 

I am really happy with how the stain allowed the dimension of the wood to show through. You can still see the variation in tones and such, which is what I was hoping for. I didn't want it to lose all definition once finished, which is why I went with stain instead of paint.

I also put together some "art" for the space next to the window. I found the brushed silver frames at Target for 50% off (with mats!) and I printed off the ampersand and the Dr. Suess quote with our printer. The ampersand is perfect for our bedroom, you know, Mr & Mrs, His & Hers, Heather & Steve. Cute stuff there people. For both pieces, it was under $15. Bargain. I chose gray for the ampersand and a gray-blue for the quote.


Printables are a GREAT way to put together very inexpensive "art" for your walls. All you need is a frame & a printer. If you don't have a printer, you could have it printed via one-hour photo at any photo lab for a buck or two. Still very cheap.

I found the Dr. Suess quote HERE and the ampersand HERE. They offer them in all different colors and there are LOTS more free printables on their site. There are so many free printables on the web, just do a search on Google or Pinterest and you'll find a bucket full. You just print them in whatever size you are looking for (I did 8x10 & 5x7), throw them in a frame and call it done! I also have made a bunch myself in Photoshop. Very easy, quick, and a bit more personal.

With the fan addition and the wall hangings, the room has more personality already. Still have to do the other roman, chair and find something for above the dresser. Among other little things. All in all, things are coming together nicely!

Pin It

Tuesday, February 21, 2012

A Bit Of Entryway Progress

As you can see here, my entry is in need of some attention still. Bare bare bare:

So I spent some time in Photoshop and made up a bunch of different printables based off a slew of ideas I found on Pinterest (you can check out all the different ones I have pinned). I just printed them here at home, since we have a new printer full of ink, but I could have just as easily ordered 1 hour photo prints of them too. I made 5 different ones, but I only have 3 white frames at the moment, so that's all I hung so far. Michaels has a great coupon for 25% off all frames (even sale ones!) for this week, so I think I'll be heading over there in the next couple of nights for a bunch. If I am ambitious I might even start working on my gallery wall in the family room too. We'll see.

Here are the 3 I have done already. It won't stay this way. I'll add more to the wall with just the one. Also, we plan to open up the dining room by knocking out the space that the 2 frames are on, so clearly that will change down the line.


I also haven't decided what to do in terms of furniture. I think once we remove that side wall, I would like to put a tall, narrow piece on the wall with the closet. Maybe something with baskets so we can store things like mittens, kid shoes, keys etc. Maybe something like this? (Target)

Although white and narrower even. We'll see what I can find.

Here are some close ups.

The one on the left says "Welcome to" and then our GPS coordinates. Although, the ones you see are not our exact ones. I didn't think that would be a great idea, putting our exact location online. So I edited a bit.

The ampersand I really like because it looks like a fancy E. That line you see through it is just a reflection of the railing. If you haven't noticed, I am trying to introduce a bit of sunny yellow throughout the first floor. With the grays and whites, it gives the first floor a nice connection. Plus it is so cheery and light.

The other two prints I made will be added as soon as I snatch up some more frames. The horizontal piece looks so lonely and definitely too small all alone on that wall.

I have also thought about adding some white coat hooks here. I go back and forth because I think they would look nice, but the thought of people hanging their jackets here makes me cringe a bit. It would be so cluttered I think. I have also thought of adding some board and batten to the entry. I'm just not sure yet. We'll have to wait and see how things end up once the walls are opened up. That chair doesn't fit and won't stay, but for now it is nice to have a spot to park it when you are putting on your shoes.

So it's coming along. Piece by piece right?  Anyone have any thoughts on where I should head in this space?